Showing posts with label technique. Show all posts

Left-Hand Trouble Shooting

Do Your Fingers Seem too Short?


Problems reaching notes, especially notes on the fourth fret of the 5th and 6th strings, are usually due to poor hand position. Shortness of reach is caused when the palm is held diagonal or perpendicular to the neck, when the thumb is hooked over the top of the neck, or when a finger, often the little finger, is held too far from the fingerboard. Review the diagrams below for the proper hand position:


String Buzzes


Buzzing or muffled tones may be due to improperly set action, worn or defective strings or frets, incorrect neck relief, plucking too hard or poor finger placement. However, most beginners will find that poor finger placement is the most common cause of buzzing or muffled tones. When fretting, place your finger next to the fret, touching it but not directly on top of it. Whenever possible, avoid placing the finger midway between the frets--this position buzzes easily and requires additional pressure to make a clear tone.


If you think something is wrong with your guitar, get the opinion of your teacher or a guitar technician. If your guitar is new, your dealer should be willing to adjust it for you (adjustments are often needed for new guitars, especially cheap ones).


Sore Fingers?


Sore fingers are sometimes due to an improperly adjusted guitar, but more often than not stem from excessive finger pressure. Here's how to find the minimum finger pressure: Place your finger against the string (next to the fret), but don't press it down to the fret. Pluck the string. You should hear a muffled sound. Continue plucking and slowly increase the pressure until the string begins to buzz. Hold the pressure there--let it buzz. The pressure needed to maintain the "buzz threshold" is very small. Now, press just hard enough to stop the buzz and break into a clear tone. This small amount of pressure--a few grams--is all the pressure you need when playing!


Source Materials


Frary, Peter Kun. Beginning to Play Classical Guitar. Book 1. Honolulu: FRM Publication, 1988.

Barre Chord Basics | How to Play Barre Chords

Barre chords are the scourge of the beginning guitarist. Like a bum knee, a prison record, the inability of matter to exceed the speed of light; barre chords hold us back. The next time an F minor chord messes with you, mess back with this:


  • Check your thumb placement. Your thumb should be pressing against the back of the neck, on the fattest part, behind the area where the 2nd finger’s hanging out.

  • Check your first finger placement. It should be parallel with the fret wire, so close it’s just barely touching the side. Roll your finger a bit toward the nut, so that the bony side of the finger is digging into the strings instead of the strings digging into what my student Casey calls the “chub.”

  • Stop pressing so hard. That first finger’s only responsible for fretting some of the strings, so don’t try to press down on each string with equal force. For example, when playing a standard barred F chord, press hard with the tip of your finger on the 6th string, and dig your knuckle into the 1st and 2nd strings, but let the finger rest lightly over the other strings.

  • Take heart. Often you can transpose a song to avoid barre chords. Also, some great guitarists never play barre chords–BB King, for example, played his way to greatness pretty much one note at a time. As he said in the U2 documentary “Rattle and Hum,” “I don’t do chords.”

To Produce Tones of the Masters

Guitarists, you're wondering how to make your instrument to produce the types tones that evoke emotions of listeners? If so, you'll want to look at the technique of classical guitar that the world's best classical guitarists use to make their audiences thrill of music.


A stellar operatic tenor makes his living producing sounds that send chills fans into ecstasy. If his voice was hoarse and rough, he never would inspire his listeners. Good sound is what differentiates the average of virtuoso singer. Likewise, a skilled musician to play classical guitar works to produce the best sound quality possible with the right hand. He attempts to refine your pitch to the point where no rudeness or impurity remains. Thus, the player puts out a beautiful tone in his own mind, then try to duplicate the elusive quality tone on the classical guitar.


In the classical guitar, the musician uses his nails to produce the tone, since using nails shine and creates a multitude of tone colors. The tone of the nail that guitarists produce the best show of course, round, sweet and ethereal in character. It has no roughness, scratchiness beats or clicks. This tone can completely delight both player and listener. Each and every guitarist should point to a sound so magnificent flawless. Do not be satisfied until the sounds coming from your guitar has this elusive quality that you hear from best artists in the genre. Experiment with your tone, to get the sound you want. Remember, even superior dynamic range, the tone should remain fresh and airy.


To produce such a tone, first get a clear concept of an ideal tone in his mind. The best way to get this concept is to hear one of the beautiful tones produced by a virtuoso classical guitarist, whether live, recorded, or classical guitar lessons. Listen again, each time trying to listen more subtle qualities of tone. When you have a clear concept of sound, try to produce the same quality in his own classical guitar. You'll find it easier because you have already heard that the tone should sound, a master of the art. From a technical perspective, performing the hits from the right hand correctly will also improve the quality of its production tone. Use both methods to hone their skills in this most important aspect of the technique of classical guitar.


Since sound quality is so crucial for its development as an artist of classical guitar, makes this exercise so important to your daily routine like practicing scales. You can also have their musicianship to the next level of attention to tone production. Online classical guitar lessons can help, too, can take classes as a studio.


When choosing a studio or a classic line guitar lessons program, make sure that instructors to produce sounds that move the hearts of his listeners. Look for reviews of their shows and listen to their recorded works. In addition, they must have teaching experience enough to have a registration for the quality of students they produce. Finally, make sure that teachers have a friendly way that allows them to explain the material to their students in a clear, using the student's preferred style of learning. Choose wisely and you will be producing the types of tones that moves the hearts of listeners too.

The forgotten finger: Your left thumb

In many routine activities (such as turning a doorknob or picking up a spoon) your fingers and thumb grasp together. This tendency often continues when placing your hand around the neck of a guitar, which leads to tension in the hand and other fingers. Your left thumb should normally rest gently against the back of the neck without squeezing. There are times (such as barring) when the thumb must apply a little pressure, but normally the fingers should do their own work, assisted by the lower arm as needed. Imagine a large rubber band from the back of your elbow to a wall behind you, gently pulling your arm back and helping to keep the fingers firmly against the fingerboard. It's also important to keep the left wrist loose as there is sometimes a tendency to bend the wrist inward towards the fingerboard to help increase finger pressure.

Slow Fast Alternation

Slow-Fast alternation is an extremely useful practice technique. And it’s exactly like it sounds: play something slow, then play it at tempo and continue alternating the two ideas. When starting to work on a rough bit, it’s important to spend more time on the slow part. Something like a 4 or 5:1 ratio of slow:fast would work well. Gradually the ratio can be worked down to 1:1. Slow-Fast alternation is best used with small portions rather than entire works.


I like to use this analogy with my students: It’s like a video game. The programmers write the code and design the game making it work exactly as they mean too, then the player executes the program and plays the game. The slow part is the programming, making your fingers do exactly as you want them; the fast is the execution, running the program.


Metronome, friend or foe?


Maybe both. Forcing tempo up with a metronome, even using slow-fast techniques, can sometimes lead to increased tension – especially with beginners. Use the metronome wisely, but if you feel that it is pushing you too hard and tensions enters your hands put the metronome down.


From my personal experience utilizing slow-fast techniques with technical exercises has tremendously improved my speed and accuracy, and I have not used a metronome on a tech exercise for about six months now. Developing good movement patterns seems to be king, and that can be done without a click track in the background.

Damping Technique For Guitar

Correct execution of string damping technique is a very important requirement for achieving a polished performance.


The main reason for damping a note, apart from the obvious one of artistic articulation, is to prevent a sustained open string from clouding the harmony when there is a harmonic change in the composition. For example a low open A bass note will continue to sound for as long as the string will sustain. If during this sustain the harmony changes to a dominant E chord the open A string will combine with the newly played notes to produce an unpleasant discord. In this case the open A string should be damped slightly before the change in harmony. This is achieived by placing your right thumb momentarily back on the vibrating A string just before playing the next chord.


The other method of damping is to simply lift the left hand fingers from the note but obviously this will not work on a open string.

Lagrima – Francisco Tarrega

Lagrima should be played with a lot of feeling. It is of moderate difficulty, but should be very attainable if one pays close attention to the fingerings of the left hand. The repeated open B should be subdued, allowing the beautiful melody to ring through. On the repeats try to change the dynamics a little. Rolling the double stops, (two note chords), here and there, will add character as well.


I found these 2 videos from Youtube, explaining both Right hand and Left hand technique for Lagrima.


Part 1:  The Right Hand Technique


Part 2: The Left Hand Technique


Score can be downloaded here:

http://guitarvlog.blogspot.com/2010/02/solos-for-classic-guitar-world-favorite.html

Left Hand Position

Thumb Position


The thumb is key to being agile on the fretboard.  The thumb should be square on the back of the neck.  It should not wrap round even a little.  Someone sitting directly in front of you should not be able to see any of your thumb.  The reason for this is that your thumb provides a stable and solid base for the fingers to fret against.  The thumb should be pushing in the exact opposite direction your fingers are pushing on the fretboard.  If it is pointing at an angle away, the neck is less stable and more likely to slip.  Also the fingers can accidentally stretch the strings and change the note you are playing.  This effect can be desirable in many situations but it should always be under control.


Active Fingers


The active fingers are the fingers which are actually pressing down on strings at any one time.  The position of these is very important.  The final joint should be as close to perpendicular to the fretboard as possible and as close to the fret wire as you can manage without actually touching it.


I find that a little nail is useful on my left hand since it provides support for the rest of the finger but you should always aim to be making the contact with the fleshy tip of your finger.  This gives a much smoother tone and lessens the hammer effect of banging your fingers so hard onto the fretboard that they create a note without any right hand action.  Often the hammer and snap are desirable but, as with everything else to do with the left hand, control is so so important.  You only want to be hammering notes when the music tells you to.


Inactive Fingers


The inactive fingers are the ones that aren’t fretting strings at any given time.  They should be hovering as close to the fretboard as possible without touching the strings.  It is unlikely that any finger is going to be inactive for very long so it should always be in a position where it can fret a string quickly.  It also looks a lot nicer for someone watching the artist.  The hardest finger for me to control in this way was my little or fourth finger.  It is so important to be able to control this finger and it took a lot of practice and concentration to reign it in but it is totally worth it.  A fourth finger which is under control is one of the greatest assets a classical guitarist can have as it makes longer stretches and intricate holds possible and, with practice, easy to do quickly.


As with the active fingers, the final joint of the inactive fingers should be as close to perpendicular to the fretboard as possible.  The actual fretting should come from the first finger joint and the angle between the second and final joint should hardly change through fretting and releasing the strings.


Individualization


Each finger should be able to move independently of the others on your hand.  This is especially hard considering your fingers often share tendons but with a lot of practice it is possible to get close to total individualization.  It is something that every guitarist should work on every time they practice.  Here is an example of an exercise:


(6i) 4 2 3 1 (5i) 4 2 3 1 (4i) 4 2 3 1 (3i) 4 2 3 1 (2i) 4 2 3 1 (1i) 4 2 3 1


Where the bracketed number and letter represent the string and the position in Roman numerals.  (6i) represents first position on the sixth string.  This pattern should be repeated up and down the strings.  Take time with every note you fret and make sure that it is as close to perfect as possible, each and every time.  I mentioned before that being in a zen type meditative frame of mind when doing these exercises is the best way and this is no exception.  It is harder than the last one for me and requires a great deal of concentration to make sure everything is as perfect as it can be.


Finally


I can guarantee your hands won’t thank me for this exercise at first but persevere.  At least 10 minutes every practice session along with the other exercises presented in the previous article and you will be well on your way to having a strong and dexterous left hand to match your finely tuned right hand.

Rest and Free Strokes

There are very few techniques that I can think of for right hand guitar playing across all genres of music.  Since this post is specifically to do with Classical, or more generally nylon strung, guitar technique I will focus on the two that are most commonly used and should become second nature to any serious guitarist.  I will talk about the rest and free strokes.  They have Italian names too, but I don’t want to confuse the matter (and I can’t remember what free stroke is in Italian either!).


Firstly the physics of how a guitar makes noise.  The string vibrates up and down, or perpendicular the plane of the soundboard.  This came as a surprise to me when I first heard it, I assumed they vibrated parallel to the plane, but it is an important fact to remember when practicing the techniques I am about to describe.  This vibration goes through the bridge and is amplified by the top surface of the guitar and the air inside.  The guitar body acts in a similar way to a speaker and pushes air backwards and forwards creating sound.


The Rest Stroke


The rest stroke is probably the singular most used technique a guitarist will use so it is very important to get it right.  The hand position should be right over the sound hole.  There are 4 phases of the rest stroke:

  • Guitarist pushes down on the string
  • String slips over nail pushing it down and is released
  • Finger follows through onto next string and rests on it momentarily (where the name rest stroke comes from)
  • Guitarist repositions finger ready for next stroke

This is the technique used by bass players who play with their fingers for the most part.  It is a very direct and punchy style of play, allowing each individual note to be heard.  It should be used whenever only a single note is being played at a time, in melodic passages.


The first stage is probably the most important.  Remember at the start of the post I said that the string needs to be vibrating up and down?  If you push the string at an angle towards the string above it, the string will vibrate at an angle.  It will settle down to the perpendicular path it naturally wants to follow but it won’t be immediate.  Only the component of the movement which is perpendicular to the soundboard will be amplified and by the time the string has found it’s natural path, the stroke’s initial amplitude will have decayed away.


Techniques to improve this include 4, 3, 2 and 1 notes on each string with varying right hand finger patterns, for example:


6i 6m 6a 6i 5m 5a 5i 5m 4a 4i 4m 4a 3i 3m 3a 3i 2m 2a 2i 2m 1a 1i 1m 1a and back


Where the number is the string and the letter is the finger (i = index, m = middle and a = annular or ring finger).  Finger patterns to use include alternating i-m-a, as seen above, i-m, i-a, and m-a.  When doing these exercises, don’t do anything with your left hand but focus on the smallest movements of your right.  Focus on the following:

  • Pushing down as close to perpendicular to the soundboard as possible
  • Only moving one finger at a time (also known as individuation)
  • Hand position try varying slightly and seeing what the effect in tone is

I like to try and get into a zen state where I concentrate on perfecting each individual movement no matter how small so I can get the maximum potential out of my hand and instrument.  You can spend a long time on this.  Everyone wants to play the cool pieces because they sound good. 


The Free Stroke


The free stroke is different to the rest stroke because you don’t have the rest.  It is used for playing chords, arpeggios and passages where the notes should ring together.  The technique is subtly different but leads to a noticeable change in the way the instrument sounds.  It is probably easier for a beginner as the technique always felt more natural to me but it isn’t as widely used and is only used for certain effects.  The rest stroke should still be your main stroke.  The technique goes something like this:

  • Guitarist tries to rest nail underneath the string and pulls upwards
  • String slips over nail and is released
  • Guitarist positions finger ready for next stroke

Again, the first stage is probably the most important.  It is difficult and impractical to get the finger completely under the string and even if you were to, you would really only have an inverted rest stroke.  You should be pulling the string back softly and letting the string follow it’s natural path in space rather than trying to direct it to only go perpendicular to the sound board.  This results in a softer, more airy tone.


The same exercises can be used to practice this technique as before.  Again, trying to focus on getting the most out of every movement and maximizing the potential of you and your instrument.


I was told to spend 10 – 20 minutes a day practicing these techniques but really you can’t do enough of this.  You should keep doing this, no matter how good you are for at least 10 minutes a session and if this is the first you have seen of them, it might be worth spending a minimum of 20 minutes a session on them with the upper time limit being up to you.  The more the better!  Remember:  Amateurs practice until they get it right, pros practice until they can’t get it wrong.

Rasgueado Technique

What is a rasgueado?

A rasgueado is a method of strumming the strings of the guitar but it is much more complicated than the typical western style strumming. Because you use all five of your fingers, you are able to add an innumerable amount of rhythmic variations and patterns.


Are there different types of rasgueados?

Yes there are. There can be rasgueados that are simply embellishments or can serve as an integral part of the rhythmic structure of your song. And there are many different finger combinations you can use to execute a rasgueado.


What is the most important part of playing a rasgueado?

That really depends on the purpose of its use. For example, if you are trying to build tension you want to focus on evenness in the finger movement (much like the importance of a tremolo) with increasing volume. If you'd rather use it as a quick explosive technique that livens your song you'll need to practice the attack and the power with which you attack.


How do I play a rasgueado?

Well let's start with the movement of the fingers. You want to maintain looseness in your hand so you don't restrict your movement and so that it is easier to stay in a continuous, fluid motion. If you want a noncontinuous rasgueado, rest your thumb on the low E string. Starting with your pinky, release it explosively across as many strings as you can. Follow it with the ring finger immediately and then the middle finger and then the index. Don't worry about hitting all strings, no one is counting. What you're looking for is the rattatattat of the strings. It should sound explosive. We'll look below for technical notes of the continuous rasgueado. There are many, many combinations of finger movements.


Remember that the exercises here are to condition your fingers to be able to more easily perform rasgueados, they are not necessarily found in traditional Flamenco guitar. They are simply an exploration of incorporating flamenco styling into your playing.


Technical Notes for Ornamental Rasgueado
  • fingers, while relaxed, should shoot like a ballistic across the strings to create and explosive sound.
  • the thumb can rest on the 6th string but it is not absolutely necessary
  • movement should occur from the knuckle of the hand, not the finger... in other words the fingers should end almost, if not completely, straight after extension
  • energy should come from the fingers and the hand, not necessarily the wrist (if your thumb is resting on the 6th string, you won't be able to generate movement from the wrist anyway)
Technical Notes for Continuous Rasgueado
  • With the single and the 2 finger exercises, you'll note that the rasgueado exercises that include the pinky and the ring finger are more awkward. This is normal. It may feel a bit more comfortable if you make sure that you're bending your pinky and your ring finger at the hand and not breaking it mid-finger at the middle joint.
  • And try not to lock the pinky but keep it relaxed.
  • Also if you do make a fist, you should almost really flick your fingers out as if you were flicking someone.
  • This certainly will create more volume if that's the effect you're going for.
  • With the continuous rasgueado you should rely more on the rhythm of the wrist than the hand as in the ornamental rasgueado.
  • In the 5 finger rasgueado, especially when the thumb follows the index down and then back up, at the bottom point the hand should pivot so it faces towards the back of the guitar. Then it should sweep back up. Think of moving it in a figure 8.
  • A lot of the movement of the rasgueado is similar to the tremolo technique. Practice both and try to find those similarities.
  • In the 4 finger rasgueado with the t x i t pattern. I have it written that the last t motion can come up. You can also rake the strings with the thumb on the way down as well... anyway try it you'll see the difference. If the exercises seem odd or awkward, give them some time and try to keep up with them. Remember these are to help build your attributes and coordination.
  • Start slow and build up speed. Your goal is to have your rasgueado sound like one continuous stroke.

rasgueadorasgueado


Further Study on The Art of Rasgueado

Tremolo Technique

The tremolo technique is one that people say you can judge the skill of a guitarist by. I don't know if I would go so far as to say that's the ONLY thing to use. But certainly once one has acquired a certain level of mastery of this guitar technique, it is a wonder to experience.

What is a tremolo technique?

Basically it's the rapid succession of the same note, played (in a row) by either three or four of your fingers on the right hand. Normally the thumb plays a bass note followed by the three notes. Sometimes the tremolo note changes as well as the bass notes.

Technical notes:

  • Try to strike the strings in a deliberate and controlled way. Don't just flail your fingers hoping to hit the string.
  • Use a metronome slowly and make each note clear and of equal volume to begin with.
  • After you feel good about your control begin to try to put emphasis on a particular note. Start with the first note, then the second, then the third.
  • Remember to try to have the majority of the movement come from your knuckles at the hand and not at the middle of the finger.
  • Try to keep your hand in line from the knuckle of your index finger down through the wrist and forearm.
  • Don't angle your wrist down, making your fingers perpendicular to the strings.
  • Use a light touch. It takes very little to get a clear tone.
  • The point of contact on the string should be in a horizontal or a slightly upward direction. For instance, the rest rest stroke requires that, when you strike it, your finger travel in a horizontal or slightly downward motion in order to rest the finger on the next string. You also dig into the string. Not so with the tremolo. You glaze over it lifting your fingers towards the palm.
  • Set the metronome to 150 or 125 depending on the lesson. And work your speed up. The important thing is to keep even and clear, speed will come.

tremolo


You can refer to my previous post: Complete Study Of Tremolo For The Classic Guitar

Esteban Classical Guitar Vol 1

snapshot20081229201641pw4

Beginning to advanced instruction in classical guitar techniques and teaching how to play over 50 songs, including Jesu Joy of Man's Desiring, Malaguena, Danny Boy, Amazing Grace, House of the Rising Sun, Lagrima, and many other Esteban favorites


Vol 1
1. Introduction
2. Tuning the Guitar
3. Right Hand Technique
4. Chromatic Scale
5. E Major, Eminor, A Minor Chords
6. Malaguena
7. GreenSleeves
8. C and G7 Chords
9. Wildwood Flower
10. Malaguena (Bonus Video)

Download:

Part 1

Part 2

Part 3

Part 4

Part 5

Part 6

Part 7

Part 8

Part 9

Part 10

Classical Guitar: Technique And Musicianship by Frederic Hand

p13213


Here's a lesson for both classical musicians and fingerstyle guitarists who want to discover their "natural dexterity" for speed, tone and effortless technique! Whether you are a beginning or advanced guitarist, you will benefit from Fred Hand's in-depth exploration of the fundamental principles of classical guitar technique. "Your body and mind have an innate ability to express the music that you hear," says Hand, "you only need to tap into this source."


By learning the essentials of good playing, such as posture, relaxation, fingernail shaping and the correct application of the free stroke and rest stroke, you will quickly become a smoother and more efficient player. As you practice your arpeggios, scales, vibrato, trills and cross-string trills, you'll learn to apply them to beautiful classical-style pieces such as John Dowland's "Lady Hunnsden's Puffe" and a dance by Gaspar Sanz.


Hand's own compositions, "A Celtic Tale," "Heartsong " and "Lesley's Song" are perfect examples of the application of classical techniques to pieces in a contemporary setting.


This is a lesson that will dramatically improve the playing of both classical musicians and fingerstyle guitarists of other traditions. 75-minutes, Includes music and tab book


Download:


Frederic Hand - Classical Guitar Technique and Musicianship.part1


Frederic Hand - Classical Guitar Technique and Musicianship.part2


Frederic Hand - Classical Guitar Technique and Musicianship.part3


Frederic Hand - Classical Guitar Technique and Musicianship.part4


Frederic Hand - Classical Guitar Technique and Musicianship.part5


Frederic Hand - Classical Guitar Technique and Musicianship.part6


Frederic Hand - Classical Guitar Technique and Musicianship.part7


Frederic Hand - Classical Guitar Technique and Musicianship.part8

Classical Guitar for Dummies by Mark Phillips

19250926 Want to be a classical guitarist, but never had a lesson? No problem, this hands-on guide teaches you all the fundamental techniques you need to play scales, melodies, and full-length pieces in the classical style. You get plenty of practice exercises to stretch your skills, selections from the classical repertoire, and a bonus audio CD that helps you play along with the music pieces from the book! --Get acquainted with your guitar, familiarize yourself with the unique make-up and parts of a classical guitar --Start making some music, play melodies on individual strings, move on to arpeggios, and get your fingers in shape with scales --Ramp up your technique, play barres, slurs, and trills; handle harmonics; master right-hand tremolo; and venture up the neck to play in the higher positions --Build your classical repertoire, from Renaissance and Baroque to Classical, Romantic, and Modern, play pieces from the major eras in classical music --Practice makes perfect,  improve your performance with expert guidance through each exercise and piece in the book Open the book and find: --Tips and techniques for playing beautiful pieces --How to read music notation and tablature --Basic finger and thumb strokes --Right- and left-hand techniques --Musical examples, charts, and photos --Music pieces from the guitar greats --The best ways to care for your guitar --A step-by-step tutorial on changing your strings.


Download

Free Online Ear Training

It's been a while I haven't updated the blog. I was extremely busy for the past 6 months. Change in working position, moving to a new house......... And importantly, I found quite many people visit my blog, and download the material from sendspace. However, I received only few compliment and most of the mail were sent to me asking for material, and tell me the files are unavailable anymore in my Sendspace account. I make no income from this site, and thus cannot afford to pay for permanent Sendspace account. Please tolerate!


Anyway, I found some good site that help training a musician's ear. Pretty good!!!


http://www.trainear.com/


This program is unique because it helps associate intervals to common songs, which is the fastest way to learn.


http://www.good-ear.com/

http://www.solfege.org/


There is a free program that you can download called GNU Solfege
Features

  • Recognise melodic and harmonic intervals
  • Compare interval sizes
  • Sing the intervals the computer asks for
  • Identify chords
  • Sing chords
  • Scales
  • Dictation
  • Remembering rhythmic patterns
  • and more..

School of Guitar: Exposition of Instrument Theory by Abel Carlevaro

carlevaro-ab


Abel Carlevaro, an exceptional virtuoso, composer and teacher born in Montevideo, Uruguay is not only one of the most important guitarists of our time but the creator of a new school of instrumental technique as well. He has been recognised as an exceptional performer worldwide and has gained the admiration and esteem of musicians such as Heitor Villa Lobos and Andr�s Segovia. His performances in the most important music centres in Europe, Latin America and the United States have been acclaimed with high praise by the public and the critics alike.


Carlevaro is a devoted composer. His musical production ranges from his "Preludios Americanos" which already form part of the repertoire of renowned guitarists in America and Europe, to his "Concierto No 3 para Guitarra y Orquesta" composed by request of and played for the first time by The Chamber Symphony of San Francisco. Other contemporary I ensembles of renown such as The San Francisco Contemporary Music Players and The Kronos Quartet have also performed some of Carlevaro's works for the first time. His "Concierto del Plata" for guitar and orchestra has been interpreted by important European and American symphony orchestras.


A profound and dedicated teacher, Carlevaro is the creator of a new school of instrumental technique, a fundamental milestone in the evolution of the guitar expounded in his book "Escuela de la Guitarra Exposici�n de la Teor�a Instrumental" (School of Guitar Exposition of Instrumental Theory), in the didactic series the "Cuadernos" as well as in the "Carlevaro Masterclass" series. These pedagogical works as well as his compositions and transcriptions are edited by Boosey and Hawkes of New York, Chanterelle Verlag of Heidelberg, Barry Editorial of Buenos Aires and Henri Lemoine of Paris.


An indefatigable researcher, Carlevaro has also invented a new guitar, the conception and design of which break away totally from traditional guitar making.


Every year Maestro Carlevaro offers Masterclasses in Europe and America and is often invited to take part in juries at international competitions for interpretation and composition. To acknowledge his exceptional merits and his relevant work in music, on March 18, 1985 the Organisation of American States granted Abel Carlevaro its highest honour, the prestigious Diploma de Honour, and in 1987 the Government of Venezuela, in public ceremony, honoured him with the Order of "Andr's Bello".


The book is the English language version of Escuela De La Guitarra.


School of guitar is a must for students of classical guitar. These techniques are vital to any guitarist. The concentration of arm movements and isolation of each hand are essential to improving technique. This is a great book to learn the modern techniques for the modern classical guitar.


Download

Sightreading made easy for guitar

Sightreading

This book will guide you through a very attractive way to learn sightreading in a remarkably very short time.

Download

The Art of Rasgueado


The rasgeuado technique is without a doubt the most impressive and characteristic element of the flamenco guitar. Author Ioannis Anastassakis has studied and researched the rasgueado technique of every significant flamenco guitarist in the world, and has compiled his work in this book in an easy and understandable notation form, with excellent explanations of each rasgueado technique. From this book, every flamenco and non-flamenco guitarist, from aficionado to professional, can learn everything about the rasgueado technique and its interpretation. Rumba rhythms and the golpe technique are also discussed. Notation and tablature.


Download

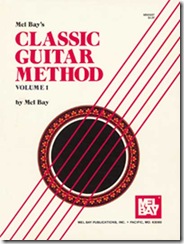
A Complete Mel Bay Method of Classical Guitar


This is a good book for Classical Guitar. However, I only have Volume 2. Anyone has volume 1, please contact me if you want to share.


images


Download